Thursday, April 29, 2010

Beauty is Our Business - Phagans Beauty School - 1966

"Beauty Begins At Phagan's"
Here's some enticing shots from a recruitment brochure for a string of beauty schools in Oregon.


"Educational and Styles Director Alan sets a fast learning pace for all the Phagans' Schools. He plans the monthly schedules, instructs advanced classes, and teaches brush-up work. Alan also has the responsibility for training the 30-teacher staff at all times on the job in the four Phagans' Schools. That he is thoroughly qualified for this exacting assignment is evidenced by the "skills" of Phagans' graduates and the demand for them in beauty salons throughout Oregon. Although he already holds a Bachelor's Degree in science, he is now working toward his Master's. But no matter how busy Alan may be, he always has time to listen to a single problem of any Phagans' student. In fact, he creates so much interest in learning that students really hate to "clock out" that last hour!"

"Blackboards help to emphasize important points, such as length of hair for a particular style and the direction of the curls for producing that style."

"Don't have clips in your hair on Saturdays"

And remember...


La Familia - July 1943 -Patterns of "Family"

Lots of Yoke action going on here...


"A large number of patterns that adapt easily to all Thai, ages and occasions, can be purchased for the modest price of $ 1.25 and $ 1.50, mailed free of postage and deposited at home. Visit or order to "BOOKS AND MAGAZINES, S. A., situated in the Rue des Arts No. 31, sending the amount along with the request, because we do not ship by C. O. D. or refund."

Tuesday, April 27, 2010

La Familia - July 1943 - Lingerie and Neck


"Very varied the embroidery that adorn the garments illustrated in these pages: there are embroidered Richelieu, the last knot point and point festoons. The thread runs Richelieu white mercerized moderately thick, and the pieces are embroidered linen threading the needle with two strands of thin wire. The game was neck and cuffs made of cloth of white linen or pique, and the combination and skirt with shiny silk material or opaque, to withstand the frequent washings without deteriorating too much, these garments can be made in yellow straw, salmon, apricot , white or green blue Nile."


"The neck has the petals of a flower about to Feston petite and center of them, past and leaves of stem point, circle, the past, and stems on the verge of stem between the figures seen Richelieu flanges. The edge point ends with festoons. The fist is executed with the same design of the neck and embroidering as explained at the beginning of the paragraph.
The combination is decorated with small bows distributed in the legs of pants and top center. The bonds are embroidered in one thread pitch, which can be: blue, pink or white orchid, the last straight or diagonal stitches. The cordes of pants and Natalie end with rippling Scallop Stitch in contrasting color, or the same shade of ties. When embroidery is finished, trim excess fabric from the waves.
The skirt is embroidered with flowers and drawing numerous circles and groups foIlage. All circles, the last royal blue, the petals of daisies, a loop point pale yellow with orange center knot point, stems, ready to stalk and leaves a green loop point.
These three pictures are taken directly from one of the supplements of the magazine, where they are drawn to size."

Monday, April 26, 2010

La Familia - July 1943 - Sport Style Models

These seem designed to give you an hourglass figure...and don't miss those hats!


"To leave in the morning adjusting the three models of dresses that are made in fancy fabrics, combined with smooth material. One of them is complemented by a color coat and dress the same fabric. The slopes are wide and trim the simplest, since only bonds can be seen in the neck and waist, sets of buttons and creases."

Saturday, April 24, 2010

La Familia - July 1943

Here I go again with a fashion magazine in a language I don't know, so we are bound to have some poor translations and mix-ups, be we can all agree she looks wonderful!


Friday, April 23, 2010

Caresse Bridal Gowns - 1970

I have this brochure from Caresse that shows some of the choices brides could make in 1970. Don't miss the hair or veils, you won't be able to miss the bridesmaids!


Thursday, April 22, 2010

The Woman's Institute - Dying, Remodeling, Budgets - Part 8

This is the last of these wonderful little books and this one focuses on remaking, redoing, and keeping what you have. "The woman who can make one clothing dollar do the work of two or three or four, has just reason for self-congratulation. Among the factors that aid her to increase the producing value of the dollar are the dye pot, the ability to remodel clothes, an intelligent treatment of clothing, and the observance of a clothes budget."


"At the beginning of each season, make a critical survey of all of the clothing you have on hand, including dresses, coats, suits, blouses, skirts, and the smaller accessories. Do not make merely a mental review, but take the garments into a good light where you can study them. Make yourself ready as though you were going out, arranging your hair becomingly and wearing a well-fitted corset, underwear that conforms with the fashionable silhouette, and good street or dress shoes. Then try on each garment in turn, and observe its lines in relation to the current fashion. Note particularly what parts need to be changed or freshened, and determine whether or not cleaning is necessary and whether adding a new piece of lace or a frill, or taking off the belt, or adding a new one would remove a worn or unseasonable appearance. Simply diagnose the case of each garment-dissect it, so to speak, and note just how it may best be improved, or where a touch of becoming, seasonable color would add to its appearance."

"Necklines - The most common necklines are round, bateau (boat shape), square, V shape, and surpliced, which is just a variation of the V neck. Much variety is possible with these shapes by using collars of different types, or by leaving the neck line collarless. A high neck line may be changed by cutting it lower. A low neck line may be built up by inserting fitted pieces and covering them with a collar, or by changing the shape, if necessary, and filling it in with a yoke of lace or chiffon or softly shirred net or tulle. The addition of a scarf often proves sufficient change if the neck line is not definitely out of style. Figs. 7 and 8 offer suggestions for various neck finishes."

"The effect of a whole dress may be changed by changing its neck line. So, study the prevailing fashion in neck lines, in order that any changes you make will be fashionable. Also, before making changes, study your own type with a view to determining the most becoming shape."

"Sleeve Changes-Sleeves date a dress by their length and their fulness. Short sleeves may be made long by the addition of transparent or heavily embroidered sleeves in bishop effect, or by joining a section of self-material and covering the joining with tucks or some other trimming feature. Three-quarter-length sleeves may be changed by the addition of full, lacy sleevelets, by adding deep cuffs, or by joining sections of self-material as just suggested for short sleeves. Or, if short sleeves are preferred, long ones may be cut off and finished to harmonize with the dress. Narrow sleeves may be increased in width by slashing them and inserting material that matches or contrasts. Plaiting this section often takes the curse off a change of this kind by removing the mark of necessity. Fig. 9 shows a variety of sleeves that offer many suggestions."

"...removing the mark of necessity..."
I just like the sound of that phrase.

"Changing Waist Lines - The waist line is probably the most difficult feature of a dress to alter satisfactorily without entirely recutting the whole garment. It may offend by being too high or too low, too tight or too loose. Of course, if the position of the waist line is due entirely to the placing of a loose belt, the belt can be raised or lowered very easily. But if the dress is cut across tt the waist line, the matter assumes a different aspect. If a high or normal waist line of this kind is to be lowered and there is available material, a wide, straight band, perhaps on the opposite grain, may be added to the bottom of the blouse. As a rule, however, recutting is the only remedy.

A waist line that is too low may be cut higher, provided there is some means of adding more length to the skirt. Just what this means should be depends entirely on the type of the dress.

When waist lines are drawn in too tightly, it is usually possible to let out some fulness and so produce a newer effect. If, on the other hand, the dress falls too loosely over the waist line, draw it in with a belt or with gathers, tucks, or plaits, or by taking in some of the material in the seams.

If the waist line is neither too high nor too low, too tight nor too loose, but still a change seems desirable, the suggestions in Fig. 10 should prove helpful. Two hem finishes, which may be repeated on the sleeve, cuff, neck, collar or as a waist-line trimming, are shown at the right and left of the center of this illustration.

Now, as to Budgeting...why, it's patriotic!


" Much discussed topics, like much discussed persons, sometimes become very unpopular. Yet many of them, like many persons, have enough individual value eventually to achieve standing on sheer merit. Such has been the case with budgeting, which is becoming an increasingly important factor in American individual and family, as well as national, life. The thoughtful person must realize that community, and even national, waste can be traced back to wrong standards of spending and the unsystematic use of resources in family and individual life. It follows, inevitably, that the place to apply the remedy is at the source of the trouble. Viewed in this light, budgeting becomes a privilege-an opportunity for every person, as a good citizen, to advance his interests and at the same time to help in making the position of the nation more secure."

I hope you enjoyed this trip back in time...I did!

Wednesday, April 21, 2010

The Woman's Institute - Laundering and Dry Cleaning - Part 7

This whole volume just makes you happy you live in today's age of washing machines and dryers...and local drycleaners!


"Following is a program that has proved its worth as a guide through the various steps of laundry work.

Monday:

1. Sort clothes.

2. Mend tears that will grow in washing.

3. Remove stains.

4. Soak soiled clothes.

5. Get equipment ready.

Tuesday:

1. Heat water.

2. Make soap solution.

3. Fill tub or washer and wash in succession (changing suds when necessary):
Table linen
Bed linen
Towels
Body linen
Handkerchiefs
Soaked clothes

4. Boil by putting clothes in cold water and letting them slowly come to boiling point.

5. Make starch.

6. Look over articles, especially if a washer has been used, to see whether further rubbing is necessary.

7. Rinse in 2 or 3 waters.

8. Blue, dipping and wringing each piece separately.

9. Starch clothes needing average stiffness, changing starch as often as necessary.

10. Hang out pieces.

11. Wash colored clothes, setting color, washing, rinsing 2 or 3 times, starching; and hang out to dry.

12. Wash cotton stockings, rinse, and hang to dry.

13. Take down clothes, piece by piece, fold and lay in the basket.

14. Dampen and roll up.

15. Wash any silk underwear, embroidery pieces, or colored clothes that must be ironed immediately, and iron. Also, wash flannels and wool or silk stockings.

Wednesday:

I . Do heavv starching.

2. Step No. 15, under Tuesday, may be left until now, if desired.

3. Iron.

4. Air.

5. Put away.


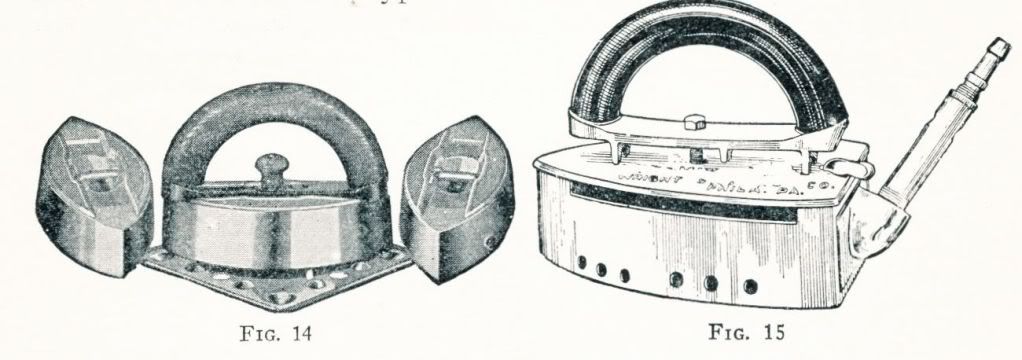
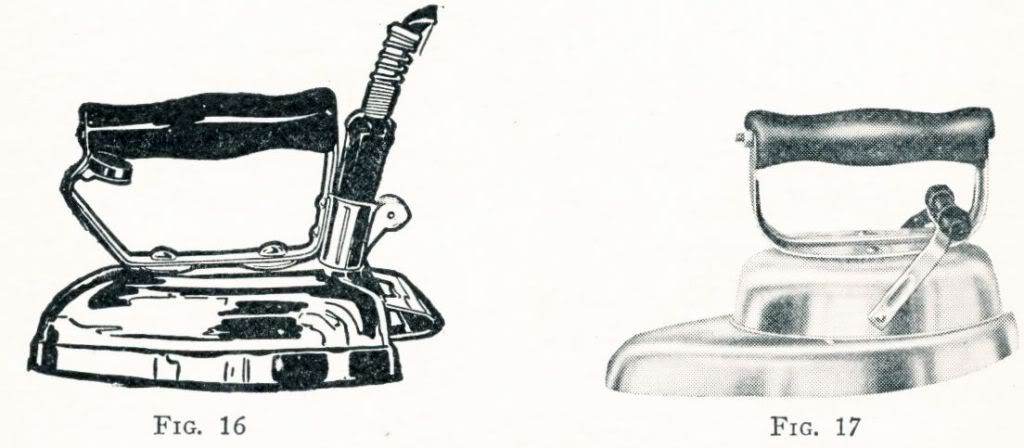
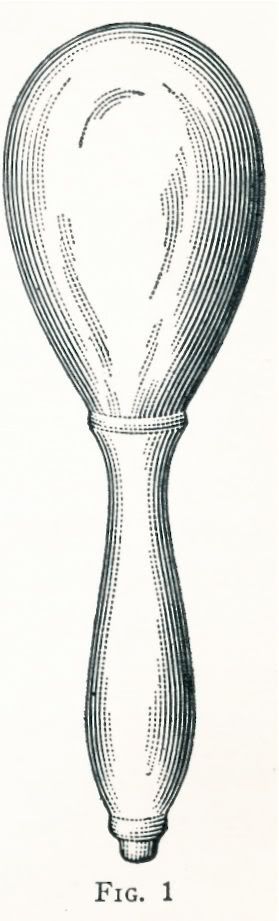
"Irons.-There are various types of irons; the old-fashioned, stove-heated flat, or sad, iron made entirely of iron, irons with removable wooden handles, also electric, gas, gasoline, charcoal, and alcohol irons. Although the old-fashioned, stove-heated iron can do its work efficiently, it cannot bring the comfort and ease to an ironer that a self-heating iron can. The woman who employs a self-heating iron does not have to consider saving steps, for instead of ironing near a hot stove or going back and forth to exchange a cold iron for a hot one, she can iron in one spot, and that a comfortable one. The type chosen, however, will depend on the facilities available for heatlng, but it is well to know the outstanding characteristic of each type."

"To protect large pieces, such as table-clothes from falling to the floor, a deep pocket of muslin may be attached to each side of the ironing sheet so that it extends from end to end of the board and within 6 or 8 inches of the floor, as in Fig. 13."

This next part comes under the Dry Cleaning portion of our book, I chose two tricky tasks that you might need to know about. Cleaning Kid Gloves and Feathers.

" Cleaning Kid Gloves - Kid gloves that are not seriously discolored or stained with perspiration may be easily cleaned by immersing in several gasoline baths, as for garment cleaning, but, if necessary, they may be handled more vigorously than fabrics."


"Fig. 11 shows the warm, gasoline, soap bath in which the gloves are first immersed. Allow them to remain in this bath a few hours to loosen the dirt; then rub between the hands and scrub with a stiff brush, as in Figs. 12 and 13, or rub on a small washboard."


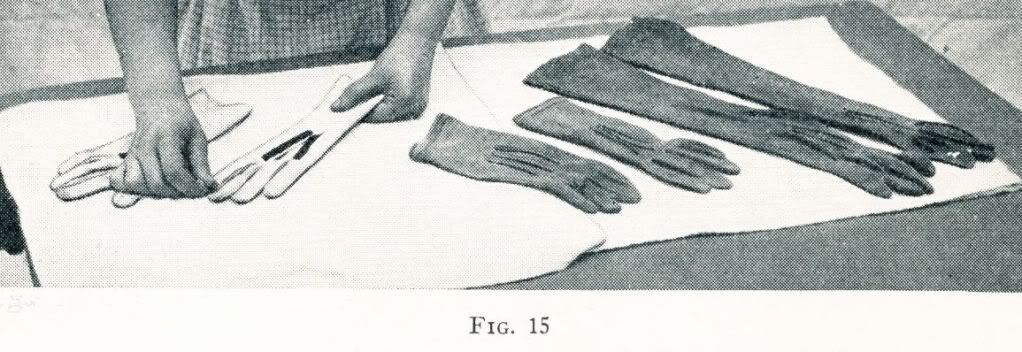
"Next, rinse thoroughly and wipe with a soft cloth. If necessary, dry further with Turkish towels, as in Fig. 14, and put on glove stretchers. Gloves should not be dried too rapidly, as this tends to make them stiff, but they may be dried as much as possible with towels and then laid in a warm place to finish drying. When thoroughly dry, shape them carefully and smooth them with the hands, as illustrated in Fig. 15."

Do you have your Gasoline, Wheat Flour and Corn Starch ready? Let's clean feathers!

"Cleaning White or Light-Colored Feathers - When cleaning feathers, aigrettes, and paradise plumes that are white or light in color, a large china or earthenware bowl, as shown in Fig. 16, should be used. Dry the bowl thoroughly, and pour into it a pint of clean gasoline. Wash the feather by sousing it up and down thoroughly.

It is generally unnecessary to rub the flues of the feathers, but if you do rub them, start at the point where the flues are joined to the stem of the feather and move the tips of the fingers outwards along the flues, pressing lightly. When the tips of the flues are reached, lift the hand and start again at the stem. Do not rub the flues back and forth, but move the fingers always in the same direction; that is, outwards from the stem to the tips of the flues.

Continue the operation until all of the flues on both sides of the stem are washed clean. Then pick up the feather and draw it through the lightly closed fist, in the manner shown in Fig. 16, in order to squeeze out most of the gasoline from the flues. Repeat this operation several times, until the greater part of the gasoline has been squeezed out."

"When the feather has been washed thoroughly in the manner just described, throw away the dirty gasoline used for washing it, and wipe the bowl clean and dry. Pour in a pint of fresh gasoline, and to it add 2 tablespoonfuls of wheat flour. Stir the flour into the gasoline until a smooth, thin paste is formed. Then stir the feather around or lay it in the paste and rub the flues lightly from the stem toward the ends with the tips of the fingers, in exactly the same manner as described for cleaning the feather the first time. When the feather has been washed completely in this way, draw it through the closed hand to squeeze out the gasoline, and shake it in the air until the remaining gasoline has evaporated and the feather is almost dry, a process that will require from 2 to 5 minutes.

When the feather is practically dry, it must be rolled in clean corn starch. To do this, spread a piece of tissue paper flat on the table and sprinkle it lightly but evenly with corn starch. Roll the feather back and forth in the corn starch by twisting the stem until it is well covered. Then shake the feather to remove the loose particles of starch adhering to the flues, and the cleaning process is finished.

The advantage of this method of cleaning is that it will not take the curl out of the feather, as in the case of soap and water, but it must be remembered that this process is for cleaning white and light colored feathers only."

Tuesday, April 20, 2010

The Woman's Institute - Home Sewing - Part 6

This volume deals with trims, mending and has an extensive dictionary of sewing terms. (I'll see what I can do about sharing those later) I'll show a few of the more obscure findings.


"Boning and Stays for Collars - usually consist of narrow widths of covered featherbone in both black and white. In Fig. 4 are shown two varieties, that in (a) being covered with silk ribbon and the one in (b), with floss. Besides collar featherbone, which is sold by the yard, there are celluloid collar stays and, as shown in Fig. 5, covered wire ones called serpentine. These are made 2 to 3 inches in length and are usually covered with silk or cotton thread. They may be purchased on cards having six collar stays on each card, or the serpentine variety, attached to a binding, as here shown, may be purchased by the yard."

"Skirt Braid, shown in Fig. 11, is a smooth, evenly woven, twilled braid that is made in only 3/4 inch width. It is used to protect the bottom of skirts from hard wear when they are long and full. Braid of this kind may be obtained in mercerized cotton or wool in all standard colors, and is sold usually by the 3-yard pIece or the bolt."

"Cabochon Foundations-In the making of bunch bouquets and various other ornaments, whether of ribbon or other materials, cabochon foundations, as shown in Fig. 17, will be found useful. Cabochon foundations are merely small pieces of buckram pressed into a dome or similar shape, here shown, those in (a) being white buckram and those in (b), black. In (a), the cabochon shown at a and b have not had their edges cut, while those at c, d, c, and f have been trimmed."

"Coat Weights, one of which is shown in Fig. 25, are round, oval, and oblong, and they vary in size from No. 1 to No. 4, the largest being about the size of a half dollar. Such devices are used to give weight to the lower edge of coats, to panels in coats, and to parts of woolen dresses."

"Shot-Weight Tape, shown in Fig. 26 (a), consists of closely woven cotton material in which small shot is held. It is used in the bottom of tunics, the ends of sashes, etc., in order to make them hang correctly."

"Flat-Weight Tape, shown in Fig. 26 (b), is used where more weight is desired than the shot-weight tape provides."

And for you youngesters this is a Darning Egg (or Darner or Darning Ball)

And this what you do with it...


Monday, April 19, 2010

The Woman's Institute - Sewing For Profit - Part 5

This edition called Sewing For Profit has lots of information on setting yourself up in business with many suggestions of things other than garments you could make for profit. Get inspired!


"As has been pointed out, a woman possessing a knowledge of sewing and garment construction may follow any one of several ways in putting that knowledge into practical use; and it is always well for her to be governed in what she decides to do by her preference for the kinds of work that will be required of her, as well as by her ability to do them, for she will make the greatest success of the work that she likes best and that she can do best. Likewise, it will be well for her to remember that if the field for work along the lines she prefers is not large enough, she should arrange to include other things in order to keep herself and, if possible, her helpers busy."

"Use of the Measure Slip-One practice that a dressmaker should never fail to follow when the customer comes to plan a dress, is to take her measurements. As it is very important that these be complete in every respect, a measure slip, such as the one shown in Fig. 6, should be used. It will be observed that this slip is arranged so as to give all the necessary information in a concise and systematic manner."