"A toy booth in a bazaar for a big metropolitan church -just fabric toys and every one of them had been made by a manufacturer! Home-made toys have long been a bobby with me, so the chairman of the toy committee was immediately searched out. "There would be more money in it," she said, "if the guild ladies made the toys." The difficulty seemed to be the stuffing. They just didn't look like anything compared to these sleek manufactured toys. The stuffing is the most difficult part, I know-but it is the most fun, too. It is as much fun, really, as clay modeling. Home-stuffed toys will never look an just alike, as factory ones do, but if a little care is used in modeling them they are as individual as people.
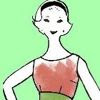
The rag baby shown here is not round and roly-poly, like most rag dolls, but rather flat. She is stuffed very tightly, yet she is quite floppy and sits down gracefully, because of sewing across the body at knees and hips. She is a little more than 12 inches high.
To make your own pattern, cut paper 8 inches wide and 14 inches deep. Rule this paper into 1-inch squares and number these as shown here. Now outline the shape of the doll so that the lines cross the squares exactly as they do here in the diagram. The dotted line is the cutting line and the solid one the stitch line. The same pattern will serve for both the front and back. Mark the stitch line on the fabric in pencil and the eyes, nose and mouth through perforations made in the pattern.
Stitch the front and back together, leaving an opening in one side for turning and stuffing. Stuff the feet and the legs up to the knees, first using tiny bits of cotton pushed in firmly with the blunt end of a pencil. Sew across the knee line. Stuff the upper part of the legs, then the head and arms, working the cotton in in little bits and shaping it from the outside with your fingers. Stuff so tightly that the doll has a chin and chest and is stiff and firm. Sew across the hipline as indicated in the diagram and sew the opening together."
From Sewing by Ruth Wyeth Spears, 1937


I love the Spears projects! Thanks for posting them.
ReplyDeleteGreat project. Thanks for finding it!
ReplyDeleteThis is a great little doll, do you mind sharing the name of the book or are you offering it for sale?
ReplyDeleteMuch thanks,
Peggy
The booklets are just called "Sewing"...but I have several and will continue to post things from them here. Later I may sell them, but I want to show more of the projects here first.
ReplyDeleteStay tuned!
This is lovely, thank you for sharing it x
ReplyDelete